Hello everyone, and welcome to the first Alpha 3.15 Patch Watch, where you’ll get an in-depth look at the upcoming personal inventory mechanic.
Choosing a Primary Residence
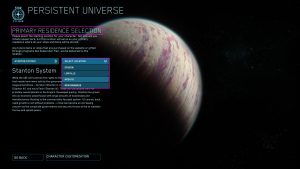
Before entering the ‘verse for the first time in Alpha 3.15, you must first select your primary residence from the main menu. You can choose between the following cities and associated space stations:
- Orison, Crusader (with Port Olisar)
- Lorville, Hurston (with Everus Harbor)
- Area18, ArcCorp (with Baijini Point)
- New Babbage, microTech (with Port Tressler)
Once selected, all your items and vehicles will be stored at your primary residence. For your convenience, each city and its associated space station share one local inventory.
One thing to keep in mind, vehicle components and hardpoint items (such as weapons and turrets) are not currently affected by the new inventory system. The only way to transport these items is to equip them on your ship, and all components you own at the start of Alpha 3.15 will be stored in your primary residence. In the future, these items will be adapted to this inventory system alongside the upcoming Cargo System Refactor.
Getting Started with the Personal Inventory
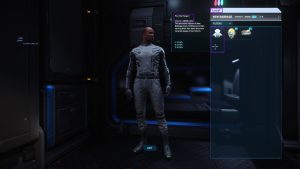
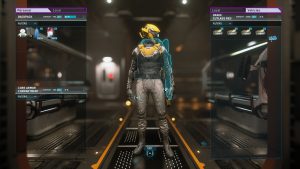
So, you’ve chosen your new home and have woken up in your hab. You won’t find your belongings in your mobiGlas app anymore, but don’t panic! Just press the ” i ” key to open your inventory.
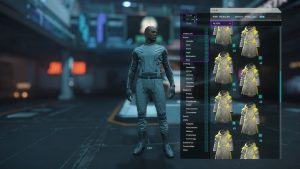
In the upper right corner, you’ll notice you’re looking at your local inventory, which is where all of your items are initially stored. If you hover the mouse cursor over one of your items, a detailed description will appear. Particularly important here is the storage space each item will use in your personal inventory. This required storage space is displayed in microSCU (μSCU). So Pico, for example, would take up 44000 μSCU.
If you want to equip an item, simply drag and drop it onto your character. Items that you want to discard, drag them to the hand symbol. But be careful, these items are placed in the game world and no longer in your inventory. Other players can now access these items and they will be lost if you do not add them back to one of your inventories.
If you’re looking for something specific, just click on the Filter tab, select the type of items you want to see, then press Apply and Done. Now only the types of items you want to see will be listed.
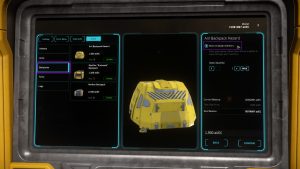
Next, let’s create additional personal inventory. For this, you need to equip some armor, plus a backpack for the maximum amount of storage. If you don’t have armor, or a backpack that doesn’t fit your armor, visit an armor store in your home city. Keep in mind that purchased items are automatically transferred to the local inventory first. You will then have to transfer them to the personal inventory if you want to take them with you.
Backpacks
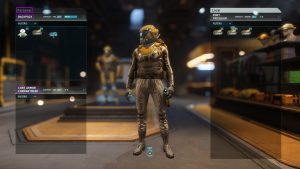
With the new changes to inventory management, we have separated backpacks from armor sets to make them their own item that can be equipped or unequipped. Players can now purchase different sizes of backpacks that will require different sizes of armor to use. This will make the largest backpacks able to be equipped on heavy armor, while medium and light armors will be able to equip smaller backpacks.
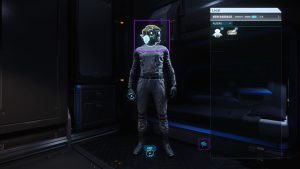
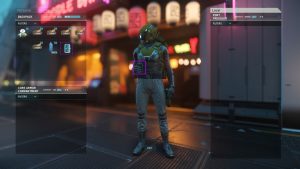
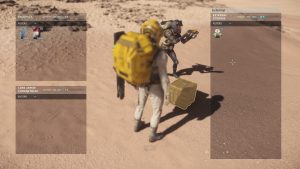
After putting on your armor, press the ” i ” key to bring up your personal inventory. You can then drag the items you want to store, but not equip, from the local inventory to the personal inventory, or from the right side of the screen to the left. Each piece of armor has its own storage as well, depending on the size of the armor. And of course, your backpack has its own storage as well. Any items left in the local Inventory will not be available to you once you leave your location, so choose wisely.
Items that you hold in your hand after purchase, such as beverages, will be dragged into the personal inventory through inventory management rather than stored through the interaction mode.
Vehicle Inventory
Once you spawn and enter a ship, the Vehicle tab will be added to your inventory management interface. You can then move items between the local inventory, personal inventory, and vehicle inventory as you see fit. Keep in mind that storage capacity is limited, so it’s best to take some time to pack your stuff before your adventure.
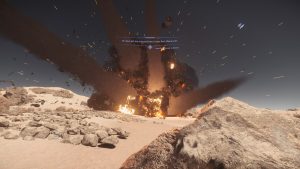
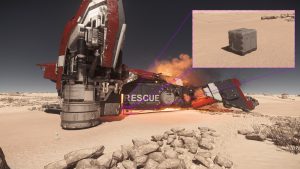
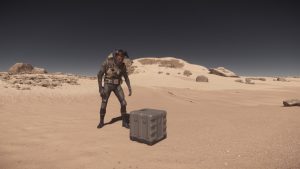
For our example, I loaded five multi-tools onto my Cutlass Red. I fWhen I flew to Daymar, and a small accident occurred and I exploded… However, I found nearby the wreckage of my Cutlass Red an external storage crate had spawned, with all five multi-tools I’d loaded previously. You will be able to find a box that contains all the items stored in a ship should you destroy it, whether destroyed intentionally or not.
These boxes will remain in the ‘verse for quite some time to potentially give you (or a prospective thief!) enough time to return to the scene of the accident and collect the items again. Remember though, you will need enough inventory space to be able to pick up all the items again.
Looting
Let’s take a look at how our example adventure went on, shall we?
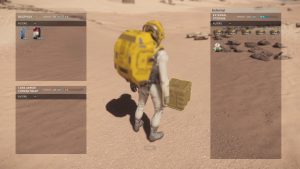
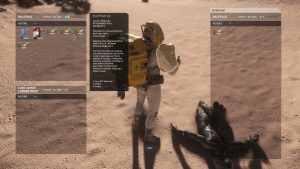
Oh my! A thief approached my external inventory box and stole my multi-tools! Fortunately, I was able to quickly settle the matter. Then, it was up to me to take advantage of the new inventory mechanic, so I searched the thief’s corpse, grabbed his backpack, and got my Multi-Tools back.
Server Crash Recovery
(We heard you liked trading fixes)
Having lost a hull full of cargo ourselves due to a pesky error 30k, we know all too well how frustrating encountering a server crash can be. For that reason, we’re very happy to announce the addition of Server Crash Recovery!
So, how does it work? We’re adding functionality that creates a “heartbeat” (regular logging with persistence) for you and your ship. So, in the case of a server crash, the backend will recognize that an unexpected timeout has happened, allowing you to visit any ASOP terminal and spawn your ship, intact and exactly as it was pre-crash. This means your cargo, ship status (health/fuel), and any items you had laying around your ship will return in the exact state that it was.
Now, it’s important to note this is merely a simple interim fix. Long term, this will all be handled by the entity graph and server meshing work, where we’ll track shard history which will allow us to properly retain information and restore you directly to the moment you left off (mid-quantum flight, etc.). Nonetheless, while this is a temporary solution, it should be effective and reliable.
It’s also important to note that this new addition is specifically for server crashes. Client crashes would still be handled in the same way they are now, with current crash recovery functionality.—-
We hope this post will make it easier for you to get started in Star Citizen Alpha 3.15!
Our teams are still improving both the UI and working on fixing a bevy of bugs (we greatly appreciate your feedback so far). Therefore, it is possible that there are still some minor changes to be made and not everything might look 100% like in the pictures above when the alpha 3.15 goes live.
Keep an eye on Spectrum, as we’ll have more Patch Watch posts coming soon!
Patch News
Patch Watch
Patch Guides
Patch List
EVOCATI
- Alpha 3.15.0 PTU.7782190 Patch Notes
- Alpha 3.15.0b PTU.7790620 Patch Notes
- Alpha 3.15.0c PTU.7793221 Patch Notes
- Alpha 3.15.0d PTU.7799372 Patch Notes
- Alpha 3.15.0e PTU.7800245 Patch Notes
- Alpha 3.15.0f PTU.7800245 Patch Notes
- Alpha 3.15.0g PTU.7804298 Patch Notes
- Alpha 3.15.0h PTU.7806000 Patch Notes
- Alpha 3.15.0i PTU.7810005 Patch Notes
- Alpha 3.15.0j PTU.7812585 Patch Notes
- Alpha 3.15.0k PTU.7814123 Patch Notes
WAVE 1
- Alpha 3.15.0 PTU.7814123 Patch Notes
- Alpha 3.15.0l PTU.7818165 Patch Notes
- Alpha 3.15.0m PTU.7822079 Patch Notes
- Alpha 3.15.0n PTU.7835451 Patch Notes
WAVE 2
OPEN PTU
- Alpha 3.15.0q PTU.7850324 Patch Notes
- Alpha 3.15.0r PTU.7858235 Patch Notes
- Alpha 3.15.0s PTU.7860358 Patch Notes
- Alpha 3.15.0t PTU.7862115 Patch Notes
- Alpha 3.15.0u PTU.7864040 Patch Notes
- Alpha 3.15.0v PTU.7865275 Patch Notes
LIVE
OPEN PTU 3.15.1
- Alpha 3.15.1 PTU.7868138 Patch Notes
- Alpha 3.15.1b PTU.7871047 Patch Notes
- Alpha 3.15.1c PTU.7874254 Patch Notes
- Alpha 3.15.1d PTU.7875648 Patch Notes
- Alpha 3.15.1e PTU.7876811 Patch Notes
- Alpha 3.15.1f PTU.7877541 Patch Notes
LIVE 3.15.1
